

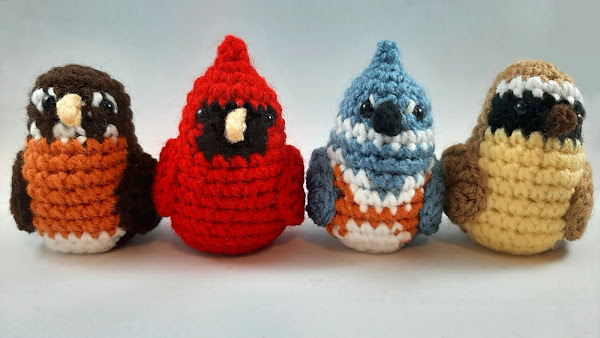
And now for the second of my three bird keychains designed for #amigurumishowcase ! I made this Common Yellowthroat after deciding that I wanted a design with a bit more colour to it! I decided on a warbler and found the Yellowthroat, a sweet little bird that I always loved to see in the marshlands back home.
This little keychain is almost the same size as my cardinal, standing about 3" (~7.6 cm) tall excluding the keychain and 2.5" (6.3 cm) from belly to tailtip. There will special instructions to work the keychain directly into the 6 sc of the starting magic circle, but you can easily skip the keychain if you'd like a little perching buddy.
You can buy a PDF copy of this pattern in a little ebook here on Ravelry! The book contains eight patterns: four coasters and four amigurumi keychains (including this one). It's the exact same pattern as you'll see here, but I bundled them up for $5 CAD to provide an easier-to-print PDF or for if you wanted to show me some support.
Here's some quick guff on the ways you can use my pattern:
- do not redistribute the pattern - just link to this page
- your results are free for personal use - but I ask that you don't sell your finished product. just hand them out as gifts, ok? your friends will love you for it
With that out of the way, on to the pattern!
ad
Materials

- Size E (3.5mm) Crochet Hook
- Worsted Weight Yarn
- I used Red Heart Super Saver in:
- Warm Brown
- Soft White
- Black
- Lemon
- Coffee
- I used Red Heart Super Saver in:
- Yarn Needle
- Stuffing
- 2 6mm safety eyes
- Keychain (optional)
Abbreviations
- ch – chain
- sc – single crochet
- hdc - half double crochet
- dc – double crochet
- sc2tog - sc 2 together
- inc – two single crochet in same stitch
- dec – invisible decrease
- ss – slip stitch
- cc – colour change
- blo – back loop only
Techniques
I have a useful guide on all the different techniques I use when I make amigurumi. Obviously, you should stick with whatever techniques you are comfortable with when making amigurumi, but I still recommend checking it out if you wanna get a result as close to mine as possible!
This pattern will ask you to work invisible decreases while working in BLO. To do this, work the invisible decrease the same as your would regularly, but use the back loop instead of the front loop.
This pattern is worked in a spiral. Therefore, there are no joins at the end of rounds.
Body
Starting with light brown (Red Heart Super Saver Warm Brown).
To start off, you'll have to choose whether you want a keychain or not. Here's how to attach the keychain as you're crocheting. If you'd like to make a yellowthroat without a keychain, simply sc 6 in magic ring instead.
 |
 |
| Thread the keychain onto your yarn and push it out of the way for now. Create a magic circle and do a sc in it as normal. | Push the keychain up until it rests against the single sc in the magic circle. |
 |
 |
| Skip over the keychain to create another sc in the magic circle. Then do 2 more sc in the magic circle as normal. There are now 4 sc in the magic circle. | Now we'll work a 5th sc into the magic circle, working through the keychain (you’ll probably have the pull the magic circle tighter to do this). Enter into the keychain and the magic circle to draw up a loop for the 5th sc... |
 |
 |
| ...then finish the sc as normal. | Do a 6th sc in the magic circle and tighten. We'll be working in a spiral, so do not join to first. |
Now you have a magic circle with 6 sc in it, with the keychain embedded in the stitches. We’ll continue on with the body.
Rnd 2: inc around. (12 sc)
Rnd 3: (sc, inc) around. (18 sc)
Rnd 4: sc 5, cc to white, sc 8, cc to brown and drop white, sc 5. (18 sc)
Rnd 5-6 (x2): sc 5, cc to black, sc 8, cc to brown, sc 5. (18 sc) Drop black yarn on the second repeat.
Rnd 7: sc 2, inc, sc 2, cc to yellow, sc 8, cc to brown, sc 2, inc, sc 2. (20 sc)
Rnd 8: sc 3, inc, sc 2, cc to yellow, sc 8, cc to brown, sc 2, inc, sc 3. (22 sc)
Now attach the safety eyes. Place them between the 2nd and 3rd black stitch from the end, between the two black rows, like so:

Now is a good time to stuff the head. I like to add some stuffing above the posts of the safety eyes then add more below to help keep the eyes in a nice position.
With that done, let’s continue on with the body.
Rnd 9: sc 4, inc, sc 2, cc to yellow, sc 8, cc to brown, sc 2, inc, sc 4. (24 sc)
Rnd 10-13 (x4): sc 8, cc to yellow, sc 8, cc to brown, sc 8. (24 sc)
Rnd 14: (sc 2, dec) twice, cc to yellow, (sc 2, dec) twice, cc to brown, (sc 2, dec) twice. (18 sc)
Start stuffing the body.
Rnd 15: BLO: (sc, dec) twice, cc to yellow, (sc, dec) twice, cc to brown, (sc, dec) twice. (12 sc)
Finished stuffing the body.
Rnd 16: dec twice, cc to yellow, dec twice, cc to brown and leave yellow tail to be hidden later, dec twice. (6 sc)
Fasten off with a weaving finish. You can hide the yellow yarn tail in the body.

ad
Wings
Make 2. In brown.
ch 5. ss in 2nd. sc. hdc. 9 dc in last. Now you will work along the back of the chains. hdc. sc. ss in last.
Fasten off, leaving a tail for sewing.
Now we’ll bring the tail up in preparation for sewing.
 |
 |
| Working along the wrong side of the wing, bring the tail up to the 2nd dc. For one wing, work in the same direction as the stitches and work in the opposite direction for the other. | Bring the tail to the front of the wing through the 2nd dc. |
Attaching the Wings
Attach the wings using the 3rd to 7th dc, basically 5 stitches. Use the placement as follows:
 |
The farthest point will be two stitches away from the yellow belly edge, two rows below the end of the mask. The next point is one stitch inwards towards the belly. The next point is one diagonal stitch down and inwards, right at the edge of the belly. The next is also one stitch diagonal and inwards, now one stitch into the belly. The next is one row below. The final point is one stitch diagonal and down towards the back, at the edge of the belly again. You’ll be sewing following the arrows. Enter into the 3rd dc to start sewing. |
 |
After sewing to the final point, enter the 8th dc and make a knot along the next stitch towards the back. |
Tail
Mark 2 stitches along the BLO round that are roughly in the middle between the two ends of the wings. Depending on how twisted your seam is, this could be 2 stitches after the seam or 1 stitch on either side of the seam. Like so:

Attach brown yarn to the first stitch, working in whatever direction is most comfortable for you. ch 1, sc in that stitch. sc in the next stitch. This is the first row of the tail.
Row 2-4 (x3): ch 1, turn. sc 2. (2 sc)
Row 5: ch 1, turn. sc2tog. (1 sc)
Fasten off. Hide the yarn tail along the edge of the tail towards the body. Tie a knot in one of the stitches of the body, then hide the tail in the body.

Beak
You’ll be attaching the dark brown yarn in the middle of the black mask, working under the 2nd row of black. This will be after the 2nd stitch away from each eye. Insert your hook from the bottom to the top. Like so:

dc in this stitch, then fasten off.
 |
 |
Hide the tail from attaching into the body. Hide the tail from fastening off along the top of the beak and into the body. If you pull the tail too tightly, the beak will get smushed. Pull on the beak until you get the desired shape, then trim the tail.
And you're done!
I hope you'll enjoy your little warbler buddy! I have some other bird-themed patterns if you'd like to check those out! Or you could see all of my patterns here.
Happy birdwatching!
No comments:
Post a Comment
This is a family friendly website, so please ensure that your comments are free from vulgar or hateful language. I reserve the right to remove comments at my discretion.
Learn about how your personal information is used when commenting here.